Showing posts with label experiment. Show all posts

Tuesday, May 10, 2011

AgBCs: O is for Onion

Onions are such a fun and accessible food to experiment with and learn about! Plus they have a long history. In fact, people have used onions for so long (before recorded history!) that no one is really sure where onions actually originated.

What we do know is that by 3000 BC several types of onions were grown in gardens, and writing on one ancient Egyptian pyramid wall even complained about the expense of providing slaves with onions and garlic! Other sources suggest Egyptian priests looked at the onion as a symbol of the universe with its round shape and the layers of the onion symbolizing the layers of heaven, earth and hell. In fact, onions are pictured on more pyramid tombs than any other plant!

Onions were even used in the creation of mummies in ancient Egypt.

Of course, the first thing most people think of when they think of onions is the aroma, which originates from an ail within the plant and escapes into the air as an irritating vapor when the onion is peeled or cut.
The release of oil from inside the onion is what brings tears to your eyes!


Early people thought onions with stronger scents had more power. In fact, early Romans often ate breakfasts of raw onions on bread, and Roman gladiators were often rubbed with onion juice to make them strong. Even Greeks in training for the early Olympics were told to eat 2 onions a day to make them strong.

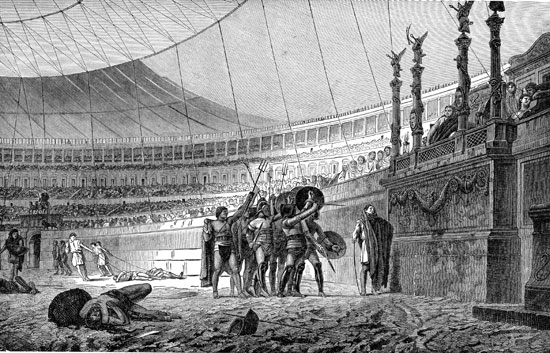
Gladiators like these ate onions and rubbed their bodies with the oil from onions to improve their strength.

In North America, wild (meadow) onions grew long before the arrival of settlers, and Native Americans ate them raw after dipping them in salted water and dried them for food use during the winter. The first large yellow onions came over on the Mayflower in 1620, and they were a staple in Colonial gardens. Our nation's first president George Washington even said they were his favorite food!

George's favorite food? Onions!
Besides learning about the history of onions, how can you turn them into a learning lesson? Simple! Here's what you'll need:


  • 3 large onions (you may want to try 3 different varieties—some are easier to grow than others)
  • 3 jars/drinking glasses large enough to hold each onion without it rolling over
  • water
Simple put the onion in each had with the rounded side down and add enough water to wet the bottom of the onion. Don't use too much water or your onion may rot. Then just put your jar in a bright area with plenty of light.

Within a week or so, you should see white roots coming from the bottom of the onion. A week or two later and you should start to see long green leaves coming from the top of the onion. The food for the leaves is being supplied by the bulb of the onion. Just make sure to keep enough water in the jar to cover the bottom of the onion.

When the leaves get about 4 inches tall, have an adult cut open the onion to see how the leaves have grown from the center of the bulb.

For a special treat, cook your onion in a dish for everyone to enjoy!

Monday, January 3, 2011

AgBC's: A is for Apples

For the first half of this year, we're going to try something fun: a look at the ABC's (or AgBC's as we'll call them) of various agricultural products, mainly fruits and vegetables. We'll look at the history of our featured products, share some simple experiments and maybe even some recipes to share with the kids in your life.
So first on the list: A is for apple.

Did you know that the apples we eat today come from apples that were grown more than 2 million years ago! Wow! When people first started eating apples, they just picked wild apples in the forest. These wild apples were small...only about the size of a strawberry....and they tasted bitter. Then about 10,000 years ago, during the Stone Age, people started planting and growing better apples.

Today's apples are related to those Stone age apples—only they are much bigger and sweeter. Apples can have skins that range in color from red to lemony-yellow to yellow-green. To me, apples taste yummy year-round, but the best, freshest ones can eb found in the fall just after they are picked. When buying apples, select firm, bright-colored apples with a fresh smell, andd they can be kept for a long time as long as they are stored in a cool place.


Now in this part of Ohio, Johnny Appleseed is pretty famous. John Chapman, as he was born, is responsible for introducing apple trees to large portions of Ohio, Indiana and Illinois. This American legend was famous because of his kindness, his generosity, and his conservation efforts and use of the apple in symbolism. He's a fascinating historical character and well worth a second look.

And now, for a little experiment on how to keep apples from browning after they are cut:

Have you ever notice how apples turn brown right after they are cut? Ever wondered how to stop that from happening?

Supplies needed: an apple, lemon juice, and lemon-lime soda (like Sprite or 7-Up)

What to do:
  1. Cut an apple into quarters.
  2. Eat one quarter, because they are delicious.
  3. Sprinkle one quarter with lemon juice, dip one in the soda, and leave one untreated.
  4. Lay them on a plate on the counter and see what happens. Which turns brown first?
  5. Have an extra apple? Repeat, only put the 3 quarters of one apple in the refrigerator. Compare what happens with those apples that are in the fridge to those that are on the counter.
Looking for a good read? Check out First Apple by Ching Young Russell, a story of a young Chinese girl's dream to taste an apple and buy one as a gift for her grandmother.

 This series is inspired by the book The ABC's of Fruits and Vegetables and Beyond.

Tuesday, October 19, 2010

Pumpkin, pumpkin, what comes next?

It's that time of year. Pumpkin patches and corn mazes are thriving. Families and even classrooms of students are picking pumpkins and decorating and carving them. But have your students thought about what comes next? After the pumpkin is carved?

This is a perfect opportunity to teach your students about the science of decomposition. Decomposition is one of the most importance processes in the garden and in nature. It's the process by which fungus, bacteria and invertebrates chance matter that was once alive (as in fallen leaves, rotting logs, and yes, even pumpkins) into fertile soil. It's not just a necessary part of the process in the garden; it's a crucial part of the life cycle. The following experiment will provide a wonderful opportunity to experience and observe this immeasurable important ecological function first hand.

The details of decomposition will become more familiar to children as they get older. The important concept for young children to walk away with is that the dead material helps grow new life. As they watch the pumpkins in this experiment rot, they will see beetles, worms, mold and other tiny organisms participating in this cycle. But there will also be millions of organisms too small to be seen participating in this process.

What you will need:

  • 2 pumpkins (1 carved and 1 not carved)
  • hand lenses
  • Optional supplies: Sign explaining your experiment, your camera and the books Pumpkin Pumpkin by Jean Titherington and The Story of a Garden by George Levensen

You will need to find a protected spot near your classroom or home where you can leave your pumpkins to decompose on a patch of soil or under a bush. If you're conducting this experiment at a school instead of your home, it's a good idea to talk to the grounds staff about your experiment and you may want to put up a sign to prevent your experiment from getting "cleaned up."

  1. Ask the children what they think will happen if the pumpkins are left outside. Record their ideas and place the pumpkins in their outside spot. Take a picture if possible to track the process. Ask them to describe what the pumpkins look like now and record their answers.
  2. Visit the pumpkins every day or at least twice a week. During that time, you can read pumpkin stories out load, starting with Pumpkin Pumpkin and later, near the end of your experiment, Pumpkin Circle. Each time you visit, ask the children to describe the appearance of the pumpkins and what is happening. Record their observations with pictures and/or words. Take another picture. 
  3. Using hand lenses, have students search for worms, beetles and other decomposers at work and discuss their role in "munching up the pumpkins" and helping them turn back into soil. Be sure to have the children look for mold and fungus as well.
  4. When the pumpkins are gone (or mostly gone), continue to visit the spot to see if new plants begin to grow there.
  5. Review the predictions the class made about what might happen to the pumpkins. Display your photographs and read the children's observations about the pumpkins over time. Ask what happened to the pumpkins, Why? What helped the pumpkins break down? What would happen if they didn't break down like this?
Decomposition is a concept that's easy to reiterate on a frequent basis, especially in the garden. What might happen to a tomato left on the ground? Who might want to each my apple core? There are many possibilities to keep in mind and remind students of the life cycles taking place in nature and in the garden.

Looking for more pumpkin fun? Here are some ideas for going even deeper!
  • Place another object, like a pile of wet leaves, another fruit or vegetable or a piece of plastic or styrofoam next to the pumpkin to compare what happens to it. Which decomposes more quickly? Which has more bugs and decomposers on it? Watch and learn together!
  • Place 4 to 8 pumpkins a few feet apart and have students hope over each one. It's pumpkin leap frog!
  • Try a pumpkin slalom, where children run in an s-shape through a line of pumpkins.
  • Have a pumpkin seed tasting. Roast seeds from a carved pumpkin or buy them in the store. Taste and compare seeds prepared in a variety of ways: roasted, toasted, salted, unsalted, etc.

Related Posts with Thumbnails